Custom Character Creator | Dev Blog

Character Creator Prototype
My goal at this stage was to put together something that even remotely resembled a character creator.
This of course is not supposed to have every feature one could think of. Obviously lacking here is body type, including a female body type. I reasoned that adding more body types would require adding more body animations, which isn't a small task, but wouldn't add to what I'm trying to test here. I did throw in a female head though - Chatty Cathy!
To be even more specific, the main focus here was on setting up and testing using Construct 3's built in effect of Replace Solid Color multiple times on a single sprite. I will get into that later though.
Here is the Construct 3 exported project you can interact with:
WASD to move
Character Creator Instructions and Explanation
Just a quick explanation on the above in case you are confused in some way or skipped interacting with it.
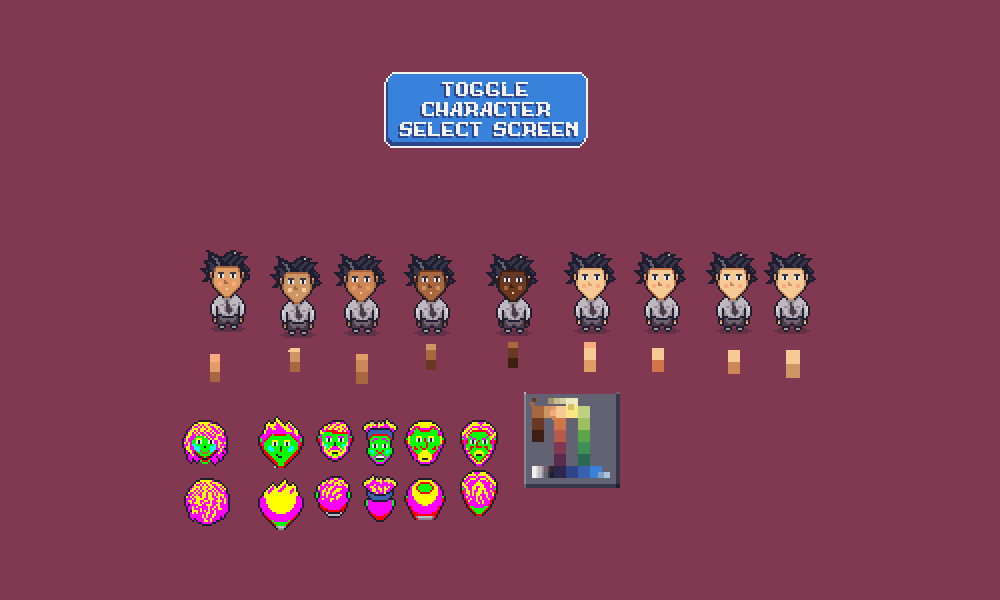
The project should open on a character, essentially your character here, and five options for you to customize: head type, skin color, hair color, tie color, and pants color.
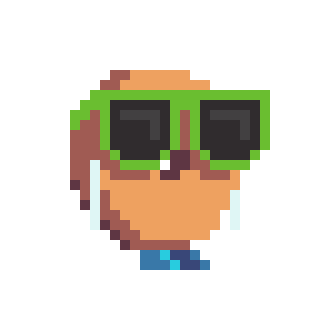
You can click or tap (mobile) the arrows to cycle through the different options. There aren't a ton of options. There are only a few options on the head type as those take a bit more work to setup and as this is only a test adding more choices here doesn't really help test anything else. The rest are all colors and I have a set color palette here and limited to only the colors that make sense or look good. For example, I didn't want to add the peach skin color option to the hair as that doesn't make sense and would have the face bleed into the hair. I did add green hair just for fun though!
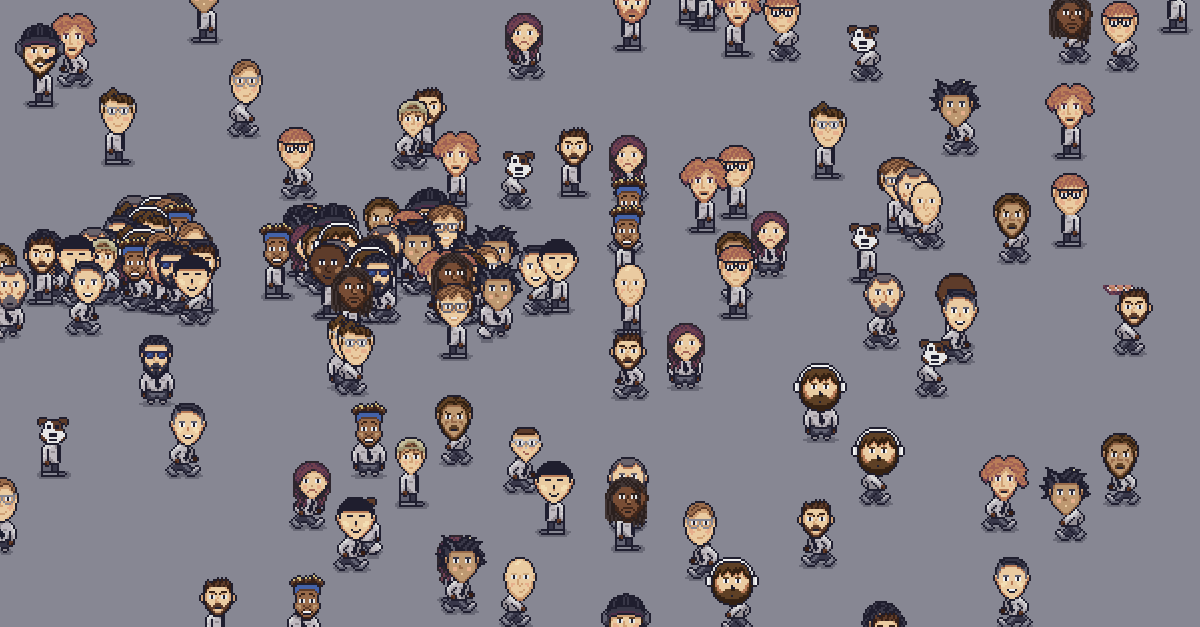
You can click the button on the bottom right or press the Z key to toggle between the character customizing screen and the other layout. This is just the layout from the previous blog post about dynamic walk cycles. The ability to toggle back and forth is to demostrate seeing your character in a game-like environment, for example being able to walk around.
The same commands from the last blog post are still in place - such as clicking to drop donuts and holding space to have characters sit down. I excluded the player character from these though.
I'll note at this point though that the player character and non-player characters are made up of the same objects and sprites. To differentiate all I did was add a boolean. Also, there is one other difference which I will get to in the next section.
My Reaction to Character Creator
I will get into how this is all setup in the next section but wanted to talk about my reactions and thoughts on this setup first.
First off, let me mention that even though this is working here the next step is a stress test. Only one character in this project, the character you customize, has all the color replace effects active. This effect is used 10 different times though. Though the effect is pretty cheap (CPU; GPU) to use, using it 10 times for each character and multiply pretty quickly.
I guess it all depends on how many characters the goal is to have on the screen. Is it a classic RPG/JRPG scenario where you have a few NPCs on screen when roaming through a town? Or is it a Zoo Tycoon scenario where you are simulating tons of little characters navigating your zoo?
Unfortunately, my thoughts are the opposite of what it would work for.
I was thinking this would be a great little setup for when you want a ton of different characters roaming around the screen that you aren't too focused on individualizing.
For an RPG type of game where you want to recognize or focus on certain NPCs I wouldn't want to take one NPC and simply swap out the hair and tie color to create another NPC. For example, if these are characters the player speaks to and wants to remember in some way. In this case I'd rather customize them individually.
I don't think this is a lost cause though. The tie color was simple enough and could save me from redrawing walk animations simply to change a tie color. Also, using the same walk animation multiple times is really helpful but the skin color of the hands needs to be changed.
So all in all, this will probably be an ongoing test and experiment to figure out when, where and how it can be used.
Character Creator Setup
Let's get into how this was setup!
The first part will cover the Replace Color Effect and how the sprites needed to be altered and the second section will go over some Construct Events and JavaScript.
Construct 3 Replace Solid Color Effect
For the head type all had to do was store the name of the head animation in an instance variable. Then I could refernce that variable and the direction the character is facing when picking the animation to show for the head.
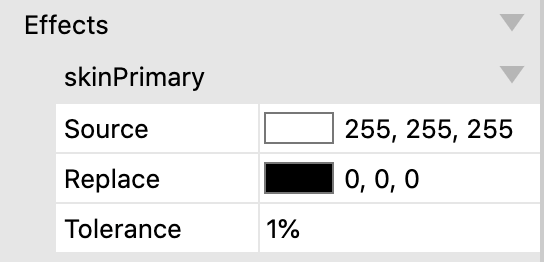
For the other options I utilized Construct's effect called "Replace Solid Color."
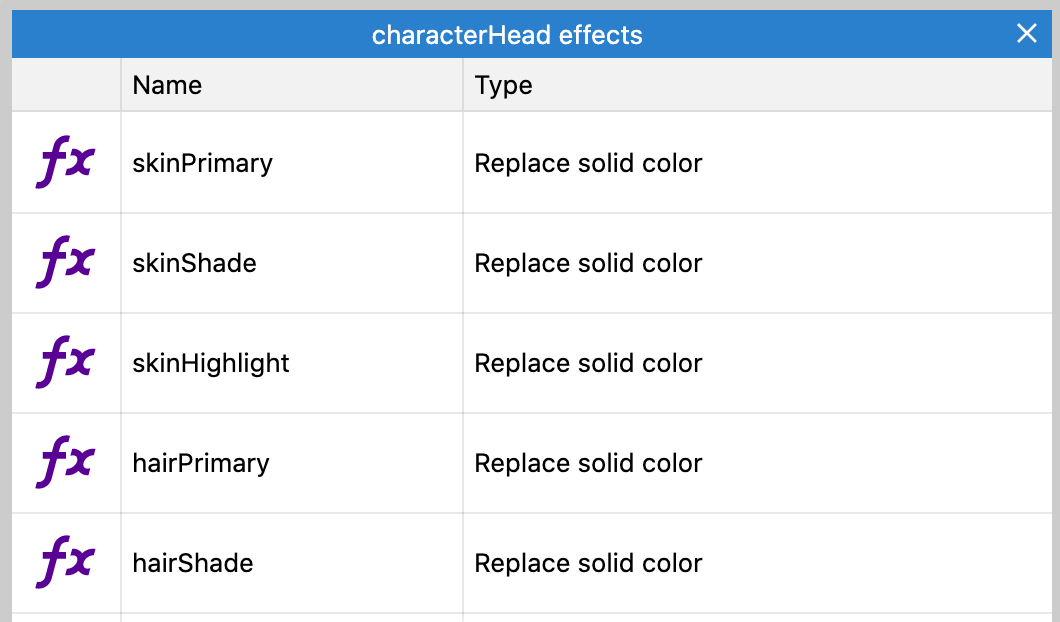
The effect setup is pretty straightforward: set a source color to be replaced and a color to replace it with. Also, you can set a tolerance, which is how close to the source color it needs to be to be replaced
Let me note on thing here because I could not find the answer anywhere when googling or looking through Construct 3 documentation:
What is the difference between Replace Color and Replace Solid Color?
I could not find the answer anywhere, and both seemed to work for me when testing, so wasn't sure which to pick. Luckily, a strange, yet mysterious, character on the Construct Discord server name Mikal provided me with this:
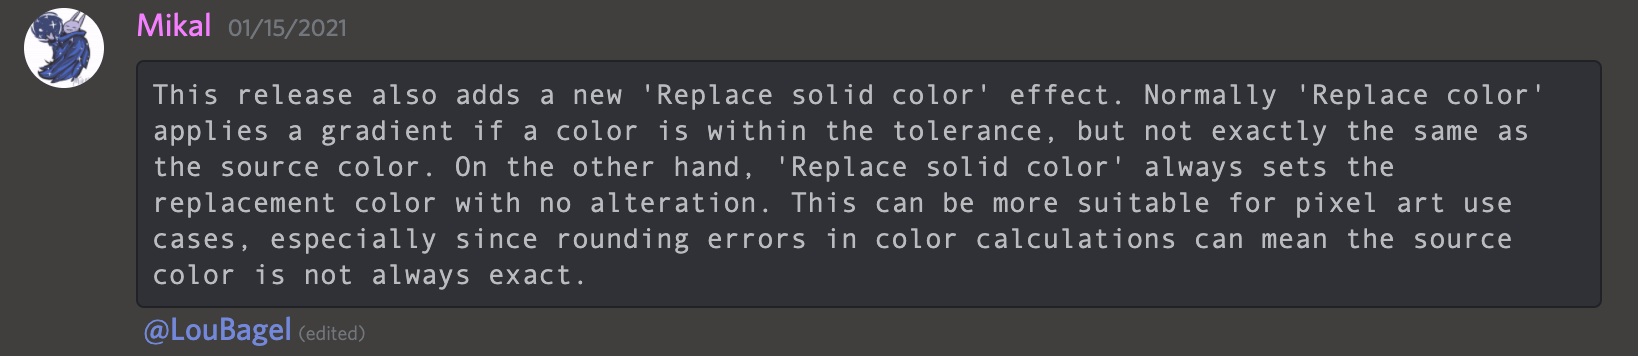
Replace Solid Color will take the Source color you provide and replace it with the provided replace color. If you provide a tolerance, as in not set it at zero percent, any color falling within that tolerance level will be replaced with the replace color as well.
Replace Color will take the Source color you provide and replace it with the provided replace color. So far the same, and if setting the tolerance at zero then they will look to act the same. But if setting a tolerance here then the colors falling in the tolerance level will be replaced as well, but not with the exact replace color you provide.
Back to the Character Selector
So now that you know how the effect works it seems pretty straightforward.
Well, maybe not as straightforward as you might expect. Not super complicated but took a bit more work.
First, if you know my characters, you might know that the different head types didn't their colors in common:
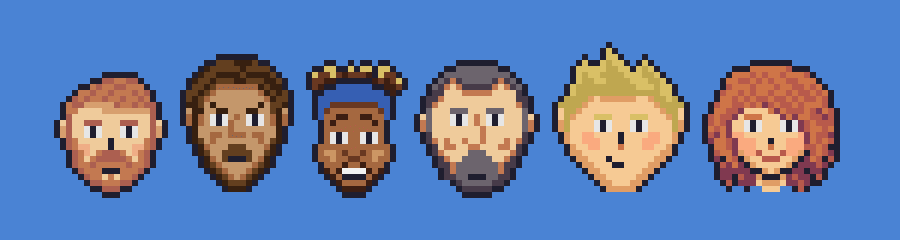
Keep in mind the colors that I want to replace on the heads: skin color and hair color.
If you look at the heads you can see that they do not have these colors in common. In this case, what color should I put for the replace color?
Well, I figured I had two different options:
- Store data on which color to replace for each head
- Edit the sprites to make them all have the same color to replace
The first option I thought might have some long term pros, but with this being a prototype best not think long term. So I deciced on the 2nd route for now.
Now I thought about picking one hair and skin color to standardize. But one issue I was sure to run into is the color being used again in the sprite. For example, if you look above Chatty Cathie's lips are used again in her hair.
That means whatever color I used to standardize, I would not be able to use that color anywhere else in the same sprite because it would also get replaced.
Therefore I decided to use colors not on my color palette. To make them easier to remember I used colors at different ends of the rgb spectrum, for example 255,0,0; 255,255,0; 0,255,255; etc. Which creates this ugly mess:
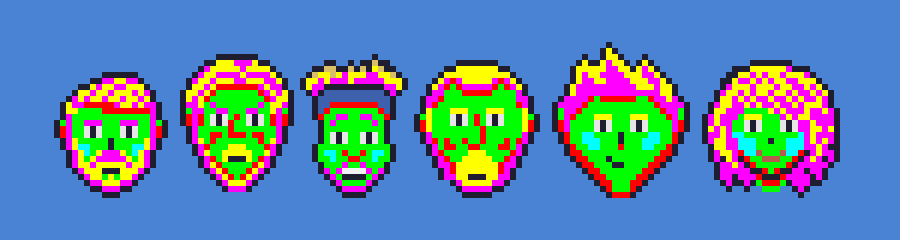
It is kind of crazy to me that these ugly messes never get seen in the project. Creating them I feel like I'm making some kind of Tron inspired game or something.
So this was the one difference I mentioned at the beginning between the dynamic and non-dynamic characters. Basically, they all work the same but I had to replace the dynamic sprites to standardize them.
Here are the actual spritesheets used in the above project:

Character Heads Spritesheet

Character Bodies Spritesheet
As you can see on the body spritesheet I had to do the same thing. I did however leave the tie at a normal color from my palette.
Code to Setup Character Creator
In this section I'm going to share some screenshots of the Construct Events and Scripts (which are in JavaScript). I won't go into too much description mainly because this code isn't too efficient and needs to be refactored. Also because I would change how I set it up if I was sure of when and how I want it to be used. Remember, this is all a test in the prototype stages still. I'm not even sure what game or project I will or would use it for!
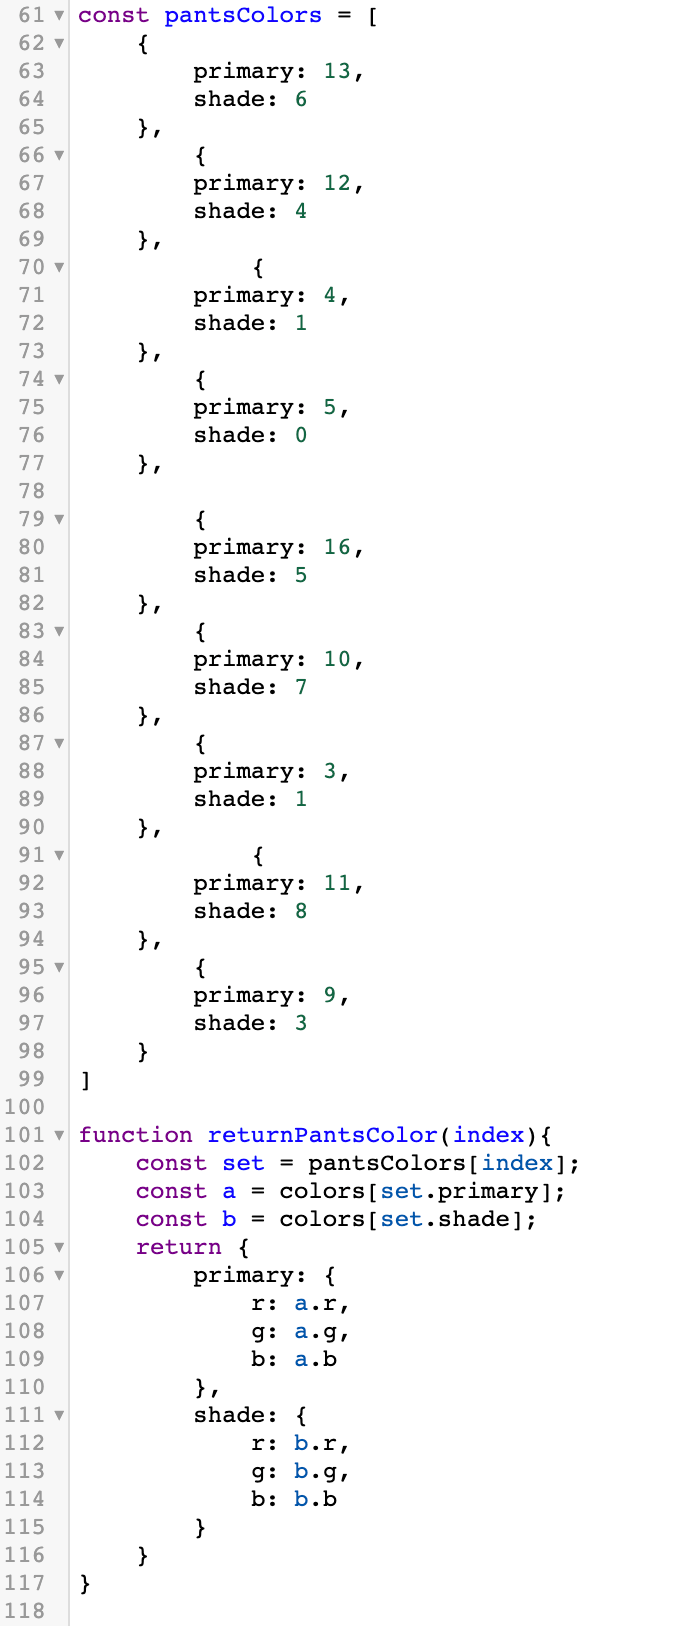
Colors Array
The first thing I wanted to do to work more efficiently is to get all the colors into code. I knew I was going to need the rgb values, individually not together, for many different colors. I didn't want to be keying them in by hand each time.
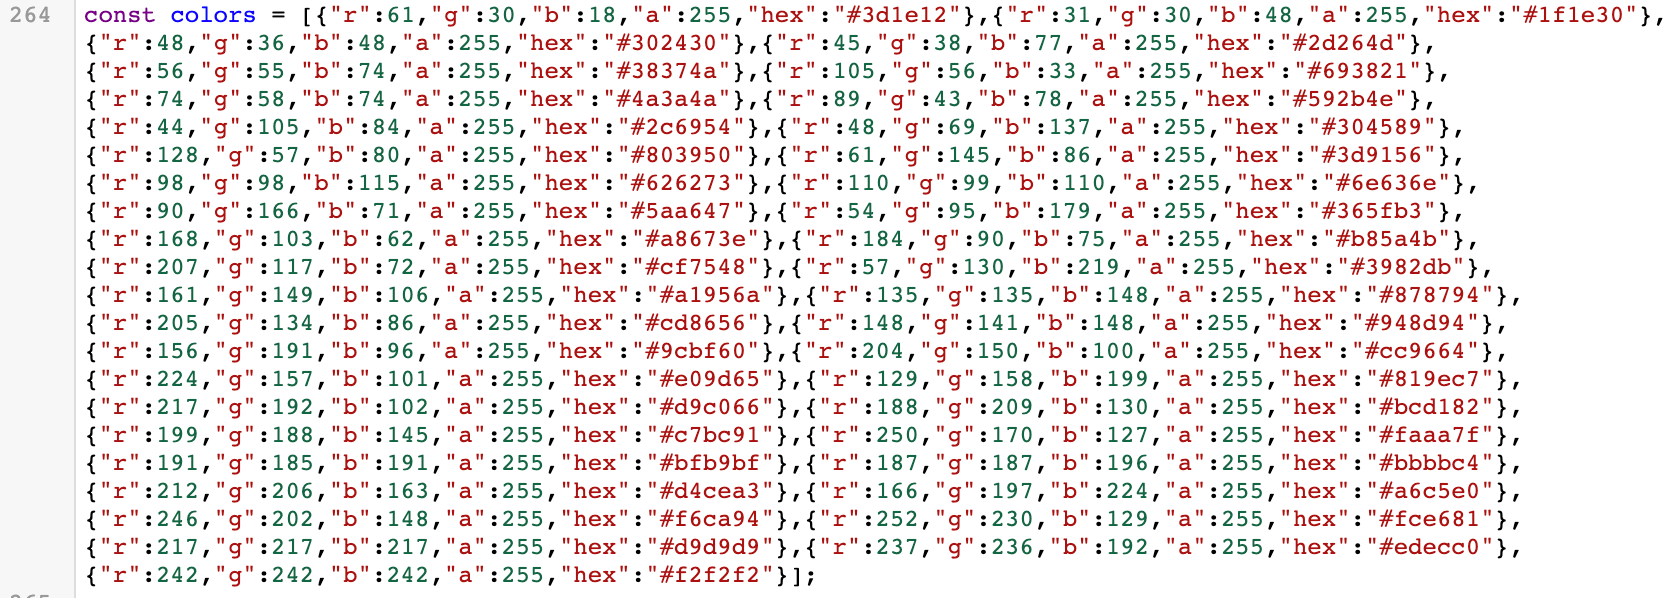
Also, I did not want to create that JSON array by hand either!
So first I made a little pixel art tool to analyze the colors in an image . I then uploaded my color palette to the tool which output the JSON above.
Then I made arrays for all the available colors for each replacement option. I created a function to return the color values, though this might have been pretty redundant. Also, I could have easily made one to handle all of them but got lazy and went the copy paste route.
Here is where the above function is called in Construct Events:
Basically this (event) function simply calls the (script) function and then passes the needed data to another (event) function. Might seem a bit redundant but you will see this next function used often and I am still getting the hang of what can and cannot be done in Construct Scripts.
Here is the set effect color function that you will see again:

It is a bit basic but really helps keep things DRY as it is versatile. The function sets the replace color on both body and head. If one of them do not have an effect named as such then nothing that part does nothing, as in no negative effect that I can see.
Here is the setup on load of the layout:
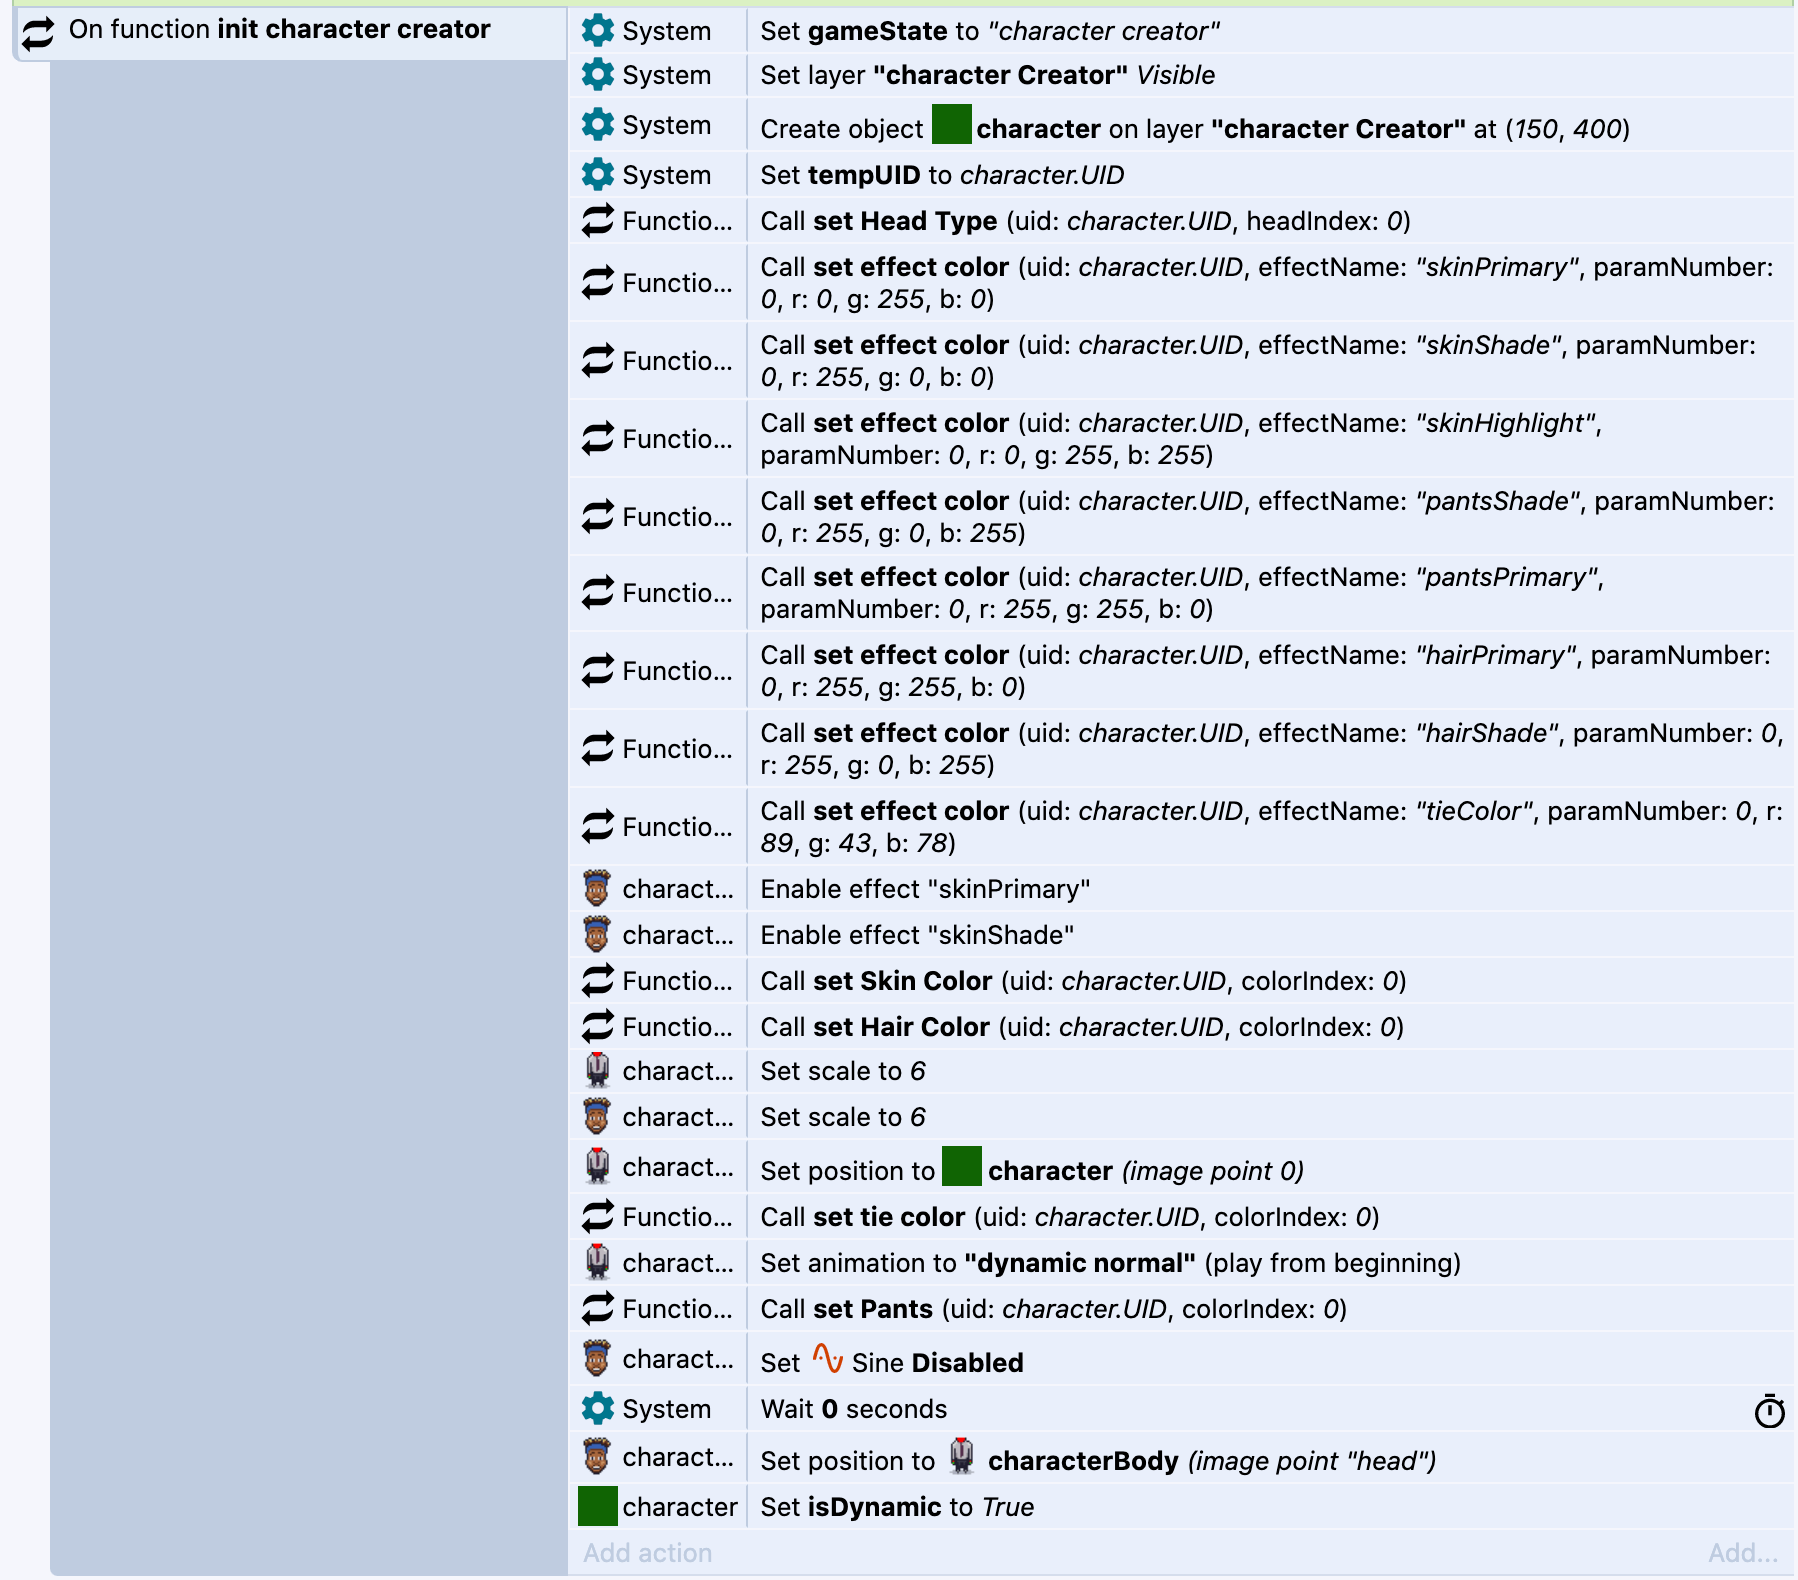
It is pretty unorganized, I know. It does several things but I will highlight a couple.
The first range of calls to the set effect color function are to set the source colors for all of the effects. As in the harsh, bright colors you saw above that need to be replaced.
Then every effect needs the replace color setup as well, as on default it is set to something we don't want, so we call every function similar to the set hair color function above to set them all to the zero index.
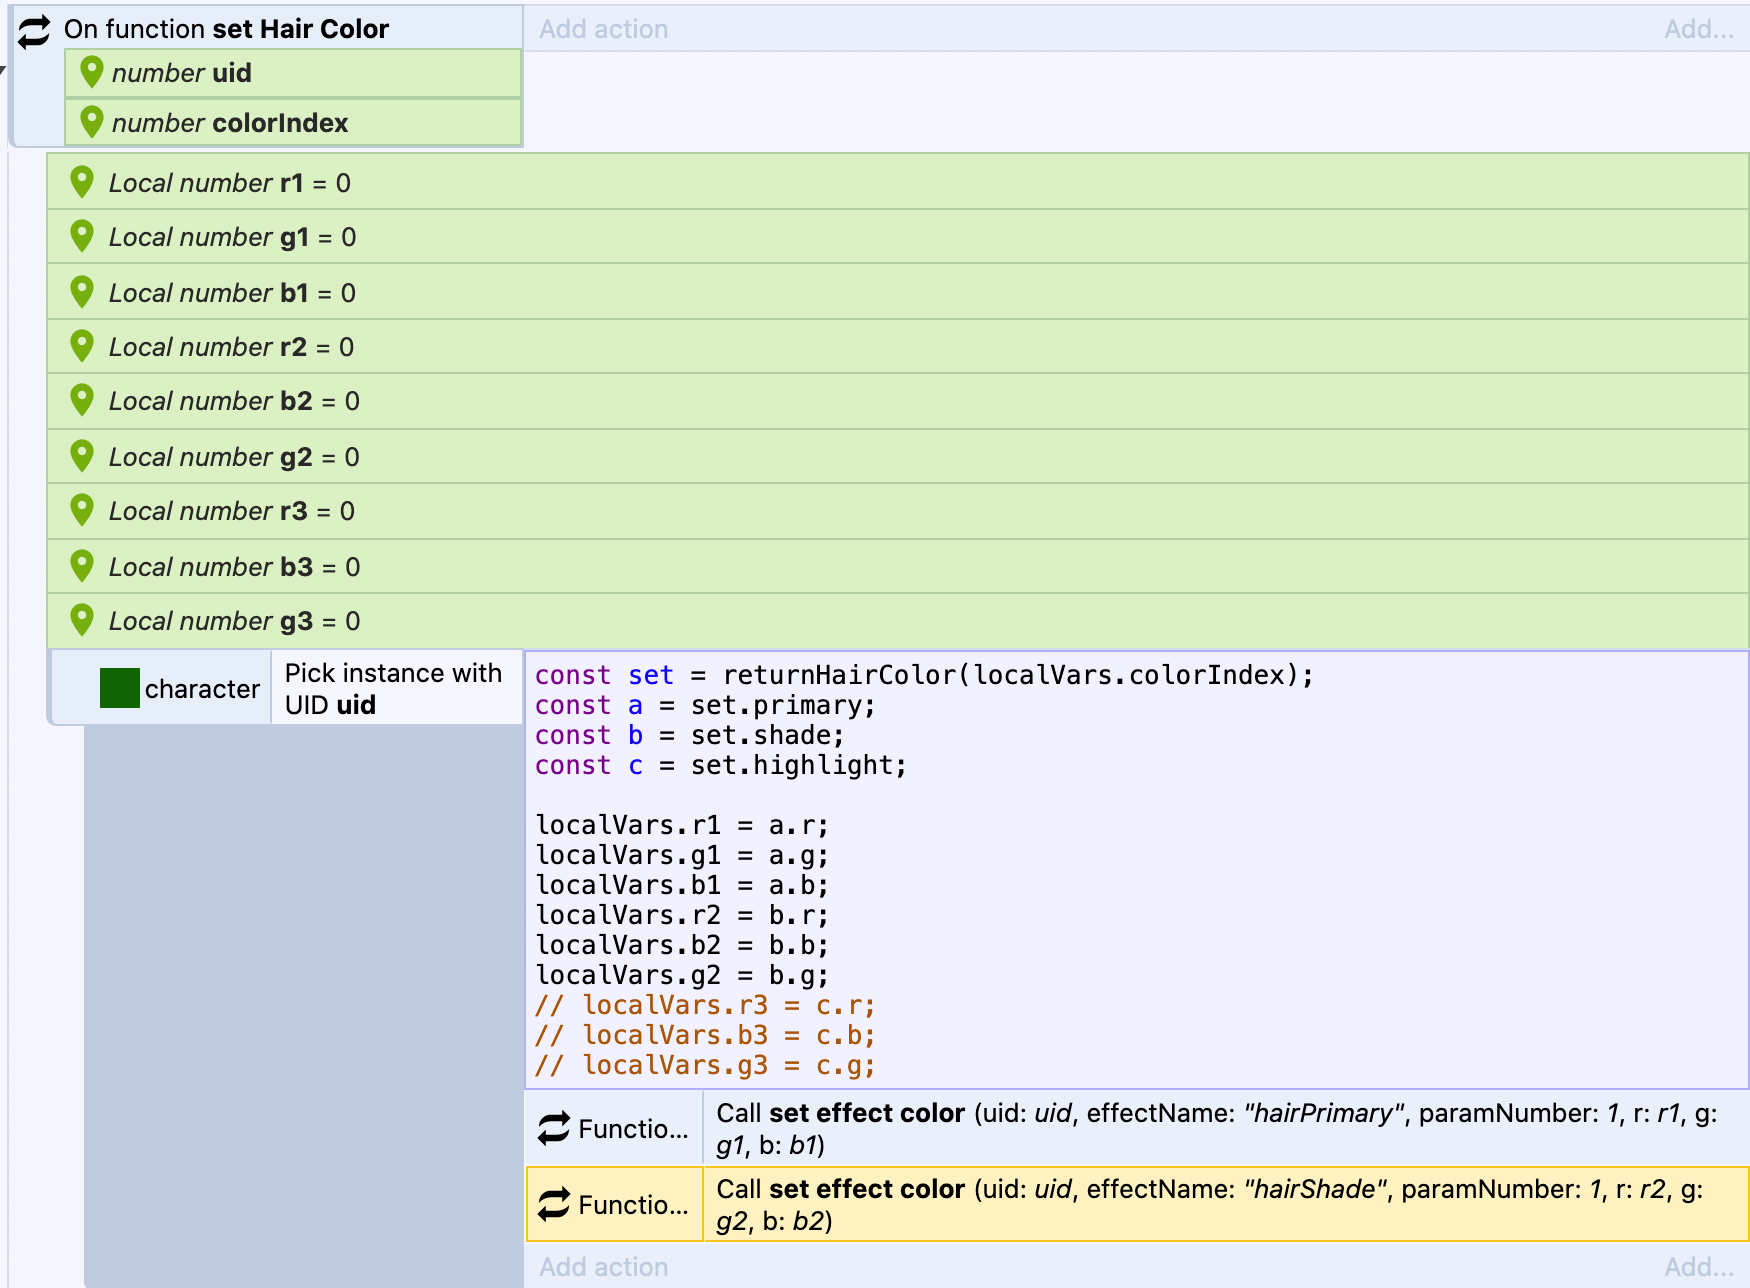
And finally, we have the event for when an arrow is clicked or tapped on the character creator screen:
This once again could be optimized to handle all of them by passing the 'type' along in the function. Though you can see how the previous functions above have simplified these events a bit as all they really need to do is call the corresponding function with the new index.
Conclusions
I've enjoyed doing this exercise but also hate seeing the characters that I antagonzied over every pixel placement get messed up slightly because they don't fit in the dynamic mold.
Next I plan to do a stress test to see the effects all the color replacement has on the CPU and GPU but I may also pivot as there are some other major features I want to look into.
Dynamic text boxes are a main one as I have an idea how I want character interactions and dialogue to take place. In keeping with the same theme though, I do expect to have a talking animation and I will probably want to see if that can be somewhat dynamic, or just how I can scale that efficiently.
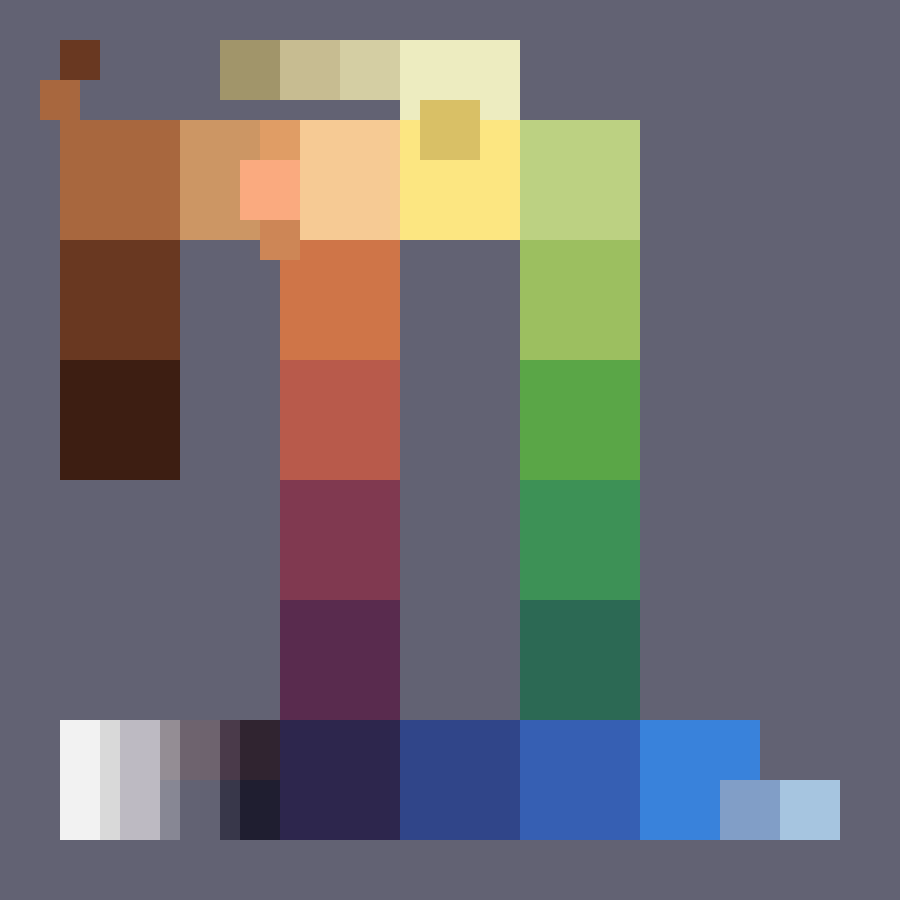
Randomly, I'll leave you with an export of the aseprite file I used to figure out what skin color choices I wanted to provide. The character her is actually Tris from the game Don't Give Up By Taco Pizza Cat . Also, on this file, I created the dynamnic heads and obviously the button.

Comments?
Below are links to where this post is shared on each social media
Instead of a comment section on the blog, I invite you to bring the comments to your social media of choice!